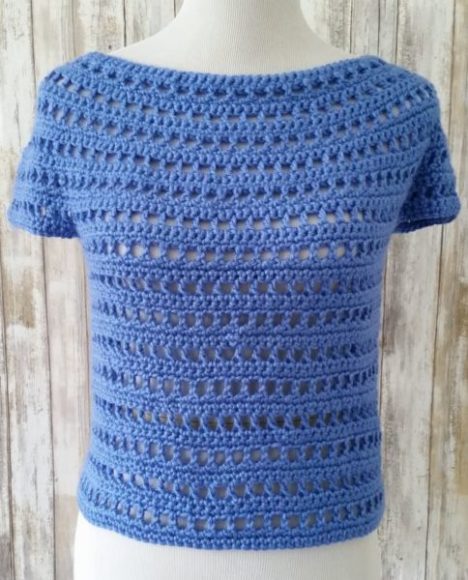
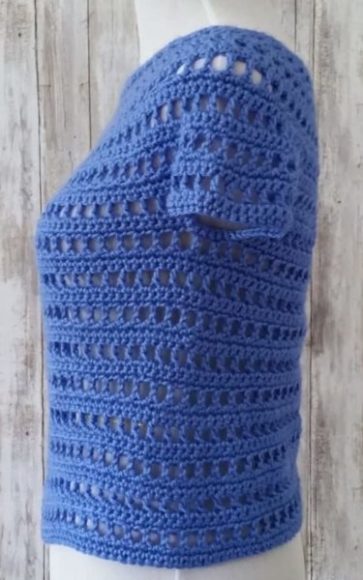
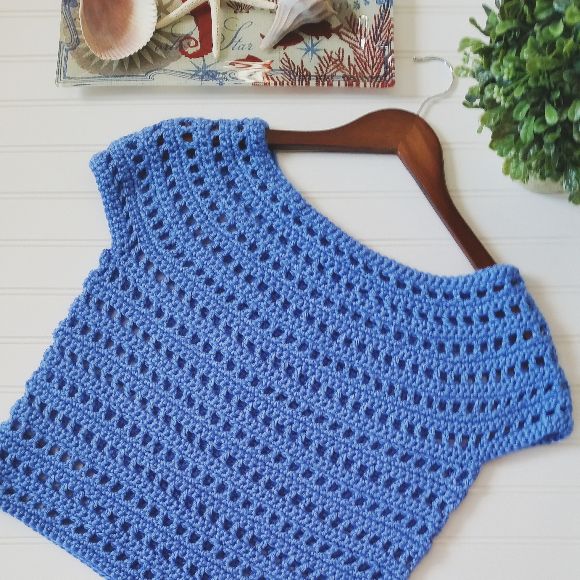
Hello! The pattern I’m bringing to you today is the Summer Berry Crochet Top. It is crocheted in the round, from the top down, with no seams!
The great thing about this type of construction is that you can try it on as you go. Have you ever spent hours working on a crochet garment, then seaming it together, only to end up more than a little disappointed about the fit? Well, no worries here! Not only can you try this top on as you are making it, you can also customize it to fit your own body with the simple instructions included below.

PIN for later HERE
ADD to your Ravelry que HERE
Summer Berry Crochet Top
Materials Used:
- Caron Simply Soft in Berry Blue (2 skeins for XS – M, 3 skeins for L – 3X)
- Size J/10 – 6.00 mm crochet hook
- Tapestry needle for weaving in ends
Sizes:
XS, S, M, L, XL, 2X, 3X
Abbreviations:
ch(s) = chain(s)
sc = single crochet
dc = double crochet
sp = space
st(s) = stitches
sl st = slip stitch
American crochet terms used throughout
Special Stitch Used:
sc2tog (single crochet two stitches together):
Insert hook into the indicated stitch and draw up a loop. Insert hook into the next stitch and draw up a loop. Yarn over and draw through all 3 loops on the hook.
Gauge:
4″ x 4″ = 14 sc, 14 rows
Finished Size Approximately:
Finished bust measures: XS = 30″, S = 34″, M = 38″, L = 42″, XL = 46″, 2X = 50″, 3X = 54″
Length and waist are customized to your preference
Notes:
This top is crocheted in the round, from the top down in one piece. A larger hook size is used so that the garment will have a nice drape.
The pattern is a 3 round repeat. All increases and decreases are made in the second round of the 3 round repeat. Because the second round is simply a round of single crochets, it is very easy to increase and decrease.
To make an increase, place 2 single crochets in the same stitch. To make a decrease, crochet 2 single crochet’s together (see “special stitch” explanation above). When the pattern calls for you to increase or decrease by x number of stitches, you may place the designated number of increases/decreases wherever you like, just try to space them out fairly evenly. They do not have to be spaced out perfectly even. The primary goal is to spread them out so they are not clumped together.
The number of stitches required per size are indicated in parentheses: (XS, S, M, L, XL, 2X, 3X).
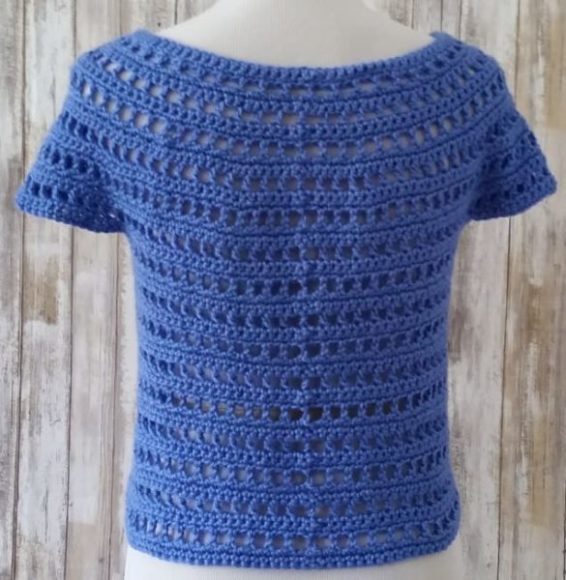
The back of the top (pictured below) is almost identical to the front.

Instructions:
Ch (84, 90, 90, 98, 102, 110, 110). Sl st to beginning chain (make sure that yarn is not twisted).
Round 1 (first time only):
Ch 1, sc in same st, sc in each ch around and sl st to beginning sc.
Round 1 (repeats):
Ch 1, turn work, sc in same st, sc in each st and each ch-1 sp around, sl st to beginning sc.
Round 2:
Ch 1, turn work, sc in same st and each st around, sl st to beginning sc.
Round 3:
Ch 4, turn work, skip the st the ch 4 comes out of, skip the next st, *dc in next st,ch 1, skip the next st; repeat from * across and sl st into ch 3 of the beginning ch 4.
Rounds 4-6:
Repeat rounds 1-3, however, on round 2 increase by (16, 20, 20, 22, 22, 24, 24) sts. At the end of this round your stitch count will be (100, 110, 110, 120, 124, 134, 134).
Rounds 7-9:
Repeat rounds 1-3, however, on round 2 increase by (16, 20, 20, 22, 22, 24, 24) sts. At the end of this round your stitch count will be (116, 130, 130, 142, 146, 158, 158).
Rounds 10-12:
Repeat rounds 1-3, however, on round 2 increase by (16, 20, 20, 22, 22, 24, 24) sts. At the end of this round your stitch count will be (132, 150, 150, 164, 168, 182, 182).
Rounds 13-15:
Repeat rounds 1-3, however, on round 2 increase by (16, 20, 20, 22, 22, 24, 24) sts. At the end of this round your stitch count will be (148, 170, 170, 186, 190, 206, 206).
Rounds 16-18:
Repeat rounds 1-3, however, on round 2 increase by (0, 0, 20, 22, 22, 24, 24) sts. At the end of this round your stitch count will be (148, 170, 190, 208, 212, 230, 230).
If you are making a size XS or S, repeat round 1 then skip to the section on splitting the yoke. All other sizes continue as follows.
Rounds 19-21:
Repeat rounds 1-3, however, on round 2 increase by (x, x, 0, 0, 22, 24, 24) sts. At the end of this round your stitch count will be (x, x, 190, 208, 234, 254, 254).
If you are making a size M or L, repeat round 1 then skip to the section on splitting the yoke. All other sizes continue as follows.
Rounds 22-24:
Repeat rounds 1-3, however, on round 2 increase by (x, x, x, x, 0, 0, 24) sts. At the end of this round your stitch count will be (x, x, x, x, 234, 254, 278).
If you are making a size XL or 2X, repeat round 1 then skip to the section on splitting the yoke. Size 3X continues as follows.
Rounds 25-27:
Repeat rounds 1-3, no increases necessary. At the end of this round, your stitch count will be 278. Repeat round 1 then split the yoke.
Splitting the Yoke:
Ch 1, turn work, sc in same st, sc in each of next (24, 27, 31, 34, 38, 41, 45) sts, ch 4, skip next (24, 29, 31, 34, 39, 43, 47) sts, sc in each of next (50, 56, 64, 70, 78, 84, 92) sts, ch 4, skip next (24, 29, 31, 34, 39, 43, 47) sts, sc in each of last (25, 28, 32, 35, 39, 42, 46) sts, sl st to beginnng sc. Your stitch count is now (108, 120, 136, 148, 164, 176, 192).
Repeat round 3. Repeat rounds 1-3. Your stitch count is still (108, 120, 136, 148, 164, 176, 192).
You are now ready to customize your top to your specific preferences. As I mentioned above, the great thing about top down, seamless construction is that you can try the garment on as you go in order to get a perfect fit!
For the length:
Continue repeating rounds 1-3 until your top is the desired length. When you are happy with the length, end after a round 2 and fasten off.
For the width:
If you want your top to remain the same width the rest of the way down, then you do not need to do any increases or decreases as you are repeating rounds 1-3 to get to your desired length. To taper your top in, decrease by 2 st on round 2 of each 3 round repeat until it meets your preference. For a roomier fit, increase by 2 st on round 2 of each 3 round repeat until it meets your preference.
For the sleeves:
Re-attach yarn at the bottom of each armhole. Sc evenly around the armhole, slip st to beginning sc. Fasten off and weave in all ends.

Enjoy! If you make one I’d love to see it – you can tag me @cashmeredandelions on Instagram!


I love it, thank you!
I’m so glad!
Hi I’m confused on the increasing part. I’ve read the part for the width and still don’t understand. It says we don’t have to increase so does that mean I can just repeat rounds until the length I want? I was wondering since when u get to making the arm holes it has the counts if I was to increase so idk if im suppose to increase and how I’m increasing like do I do one sc in the next 2 stitches then inc in the next stitch or how
You do not need to do any increases or decreases and you can simply repeat rounds until it is the length you want. Good luck!
Do you have a video/tutorial for this beautiful top? Thanks.
Unfortunately I don’t. Thanks for checking!
Can these sleeves be extended to 3/4 length?
Of course, but it may take some trial and error. You could use the same 3 round repeat used on the body, or maybe change it up a bit by just doing the sleeves in sc. I hope this helps!
Row one states – Ch 1, sc in same st, sc in each ch around and sl st to beginning sc. however on the row 1 repeat it states to sc in each sc and chain one space. What chain one space? There is no mention of chain one on previous row. It only states to chain one at beginning but not to repeat. Did I read it wrong or is that missing?
I apologize for the confusion. Here is how the pattern is worked: Start with the instruction titled “Round 1 (first time only)”. Then follow the instruction titled “Round 2”. Then follow the instruction titled “Round 3”. Then follow the instruction titled “Round 1 (repeats)”. When you are working the instruction titled “Round 1 (repeats)” you will be working into Round 3, which has chain spaces. I hope this helps!
Hi – Lovely explanation and pattern – but just one clarification – why do we have to turn since we are joining to the first st can’t we go in rounds without having to turn the project.
Great question. You don’t have to turn if you don’t want to, but the stitch pattern will not look exactly the same as pictured in my photos. It will still look quite nice though I imagine!
Hi Kathryn
Thnaks for the lovy pattern. Please can you help me in how to increase the width.. I am unable to figure out…
Look forward to your reply.
Regards
Anita
So glad you like the pattern! For help on increasing the width, please see the section of the pattern titled “for the width:” which explains how to increase the width. Happy crocheting!
What yarn weight is it? Thank u 😊
It is a #4 worsted weight. Happy crocheting!
Hi Kathryn,
Do you think you could do a video tutorial on YouTube? I am a visual learner. I love this pattern, I’ve been looking for one for a while. If not I will try to wing it with your written instructions only.
Thank you for your time,
Namaste 🙏 Mary
Mary,
Thank you for the inquiry but I have to confess that technology isn’t really my thing so I am not doing videos at this time. I encourage you to give the pattern a try based on the written instructions only. If you get to a technique or phrase you don’t understand, then just google the word or phrase and I bet you will be able to find a video that some other talented soul has already created and shared! Happy crocheting!