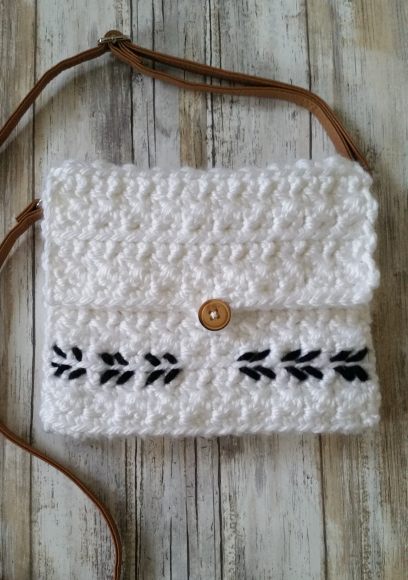
I am so excited to share with you my very first crochet purse pattern! It is the Minimalist Crossbody Purse. I don’t know about you, but I have a tendency to carry everything but the kitchen sink in my daily purse, so I always switch to a smaller crossbody style purse when I go to the flea market, park, or anywhere that I want to travel just a little less encumbered. This purse is extremely easy to make… so easy, in fact, I can’t help but wonder why I didn’t make one sooner! I used a 6 – super bulky yarn for the body and flap of the crossbody purse, an upcycled strap, and added a fun “arrow” embellishment on both the front and back to give it a modern feel. If you would like to make one, read on!
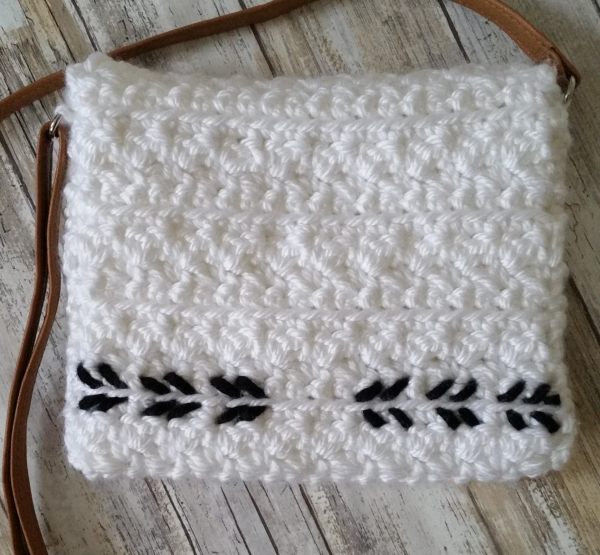
PIN for later HERE
ADD to your Ravelry que HERE
Minimalist Crossbody Purse
Materials Used:
- 2 skeins Yarn Bee True Colors in White
- Small amount of Yarn Bee True Colors in Black (for arrow embellishment)
- Size N – 9.00 mm hook
- 7/8 in (22mm) button
- 1 upcycled purse strap (or you can crochet your own – if you crochet your own you will need more yarn)
- Tapestry needle
Abbreviations:
ch(s) = chain(s)
st(s) = stitch(es)
sc = single crochet
dc = double crochet
FLO = front loop only
American crochet terms used throughout
Gauge:
4″ x 4″ = Ch 10, work rows 1-9 of pattern
Finished Size:
9.5″ x 8″
Instructions:
Body:
Row 1 (WS):
Ch 22, sc in 2nd ch from hook and each ch across, turn.
Row 2 (RS):
Ch 1, [sc, dc] in 1st st, skip st, *[sc, dc] in next st, skip st; repeat from * across, ending with a sc in last st, turn.
Row 3:
Repeat row 2.
Row 4:
Ch 1, sc in each st across, turn.
Row 5:
Ch 1, sc FLO in each st across, turn.
Row 6:
Repeat row 2.
Row 7:
Repeat row 2.
Rows 8-31:
Repeat rows 4-7 [six times].
Row 32:
Repeat row 4.
Row 33:
Repeat row 5.
Flap:
Row 34:
Repeat row 2.
Row 35:
Repeat row 2.
Row 36:
Repeat row 4.
Row 37:
Repeat row 5.
Row 38:
Repeat row 2.
Row 39:
Repeat row 2.
Row 40:
Repeat row 4.
Row 41:
Repeat row 5.
Row 42:
Repeat row 2.
Row 43:
Repeat row 2.
Row 44:
Ch 1, sc in each of first 10 sts, [sc, ch3, sc] next st, sc in each of last 10 sts. Fasten off.
To add the arrow embellishment:
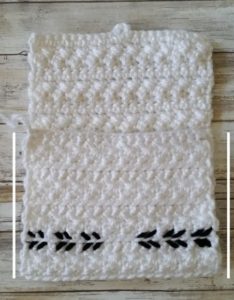
Cut two long lengths of black yarn. Thread the first length of yarn on your tapestry needle and with RS facing you, add the embellishment detail on rows 12 & 13. (These stitches are for the embellishment detail on the front of the purse). Fasten off.
Thread the second length of yarn on your tapestry needle and add the embellishment detail on rows 20 & 21. (These stitches are for the embellishment detail on the back of the purse). Fasten off.
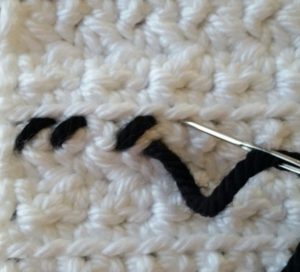
Please note that you will add the embellishment stitches just above and below the unworked loops from the sc FLO. Follow the photos below for stitch placement. You will simply make a series of slanted slash marks (/). The slash marks lean to the right on the bottom row (as shown in the photo directly below) and to the left on the top row.

To assemble:
With RS facing out and WS facing in, fold row 1 up to meet row 33.
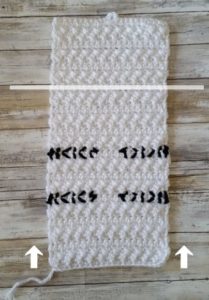
Thread a length of white yarn on your tapestry needle and whip stitch together one side of the purse as shown in the photo below. Fasten off. Thread a length of white yarn on your tapestry needle and whip stitch together the opposite side of the purse as shown in the photo below.
Sew on your button to line up with the buttonhole. Sew each end of the purse strap securely onto each side of the purse.
A note about purse straps:
To use an upcycled strap, locate an old or thrifted purse which has the type of strap you are interested in using. Most straps are attached to the body of the purse via O rings or D rings. Cut the strip of material holding the O or D ring to the body of the purse. Obviously, you do not want to cut the purse strap itself. Your goal is to end up with a strap that still has an O or D ring connected at each end.
To attach my yarn to the D ring on my purse strap, I used the same method I would use to attach fringe. I cut a length of white yarn, doubled it over so there was a loop at one end, pulled the loop through the D ring, then pulled the length of the yarn through the loop.
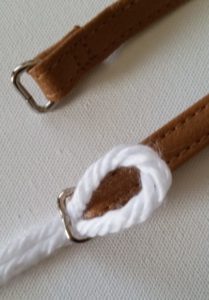
I put two loops in each D ring, then used the yarn tails to sew each end of the strap to the body of my purse.
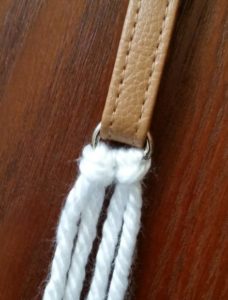
If you choose to crochet your own strap, there are many methods available. You could just do a few rows of single crochet in your desired length. Alternatively, Planet June (planetjune.com) has a great tutorial for a basic crochet cord.
Weave in all ends and enjoy your new purse! If you make one I’d love to see it. You can tag me @cashmeredandelions on Instagram!

