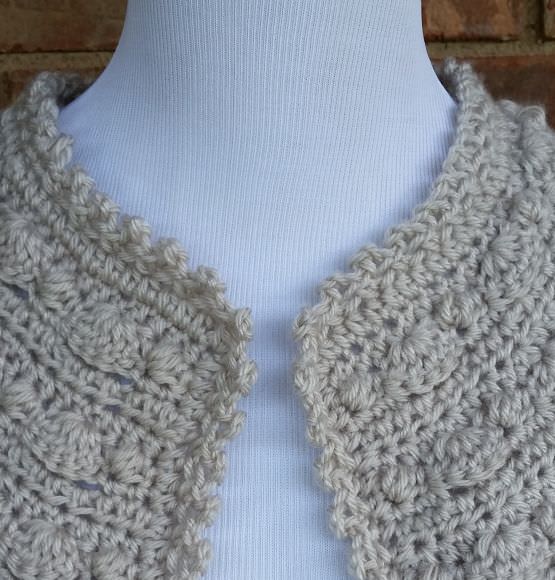
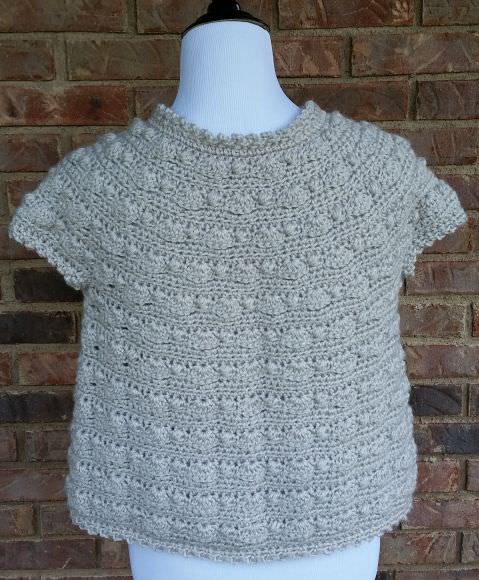
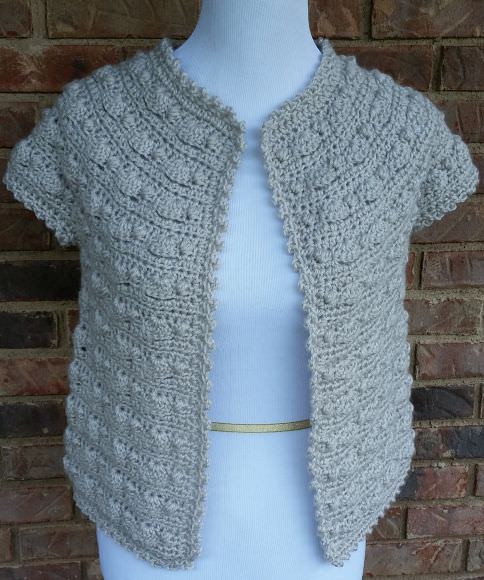
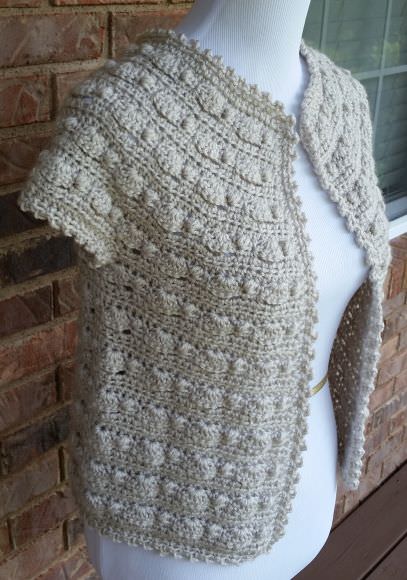
I have another fantastic (and free) crochet pattern for you today – the Beachcomber Crochet Cardigan! This cardigan could not be any simpler, as it is crocheted from the top down and does not require buttons. It is a great transition piece and the shell and bobble pattern reminds me of times spent taking long walks on the beach, looking for shells and other treasures.

PIN this to your Pinterest boards here.
ADD to your Ravelry que here.
Beachcomber Crochet Cardigan
Materials Used:
- Lion Brand Vanna’s Choice in Linen (S = 4 skeins, M = 5 skeins, L = 5 skeins, XL =6 skeins)
- Size J/10 – 6.00 mm hook
- Tapestry needle for weaving in ends
Sizes:
S, M, L, XL
Abbreviations:
ch(s) = chain(s)
sc = single crochet
hdc = half double crochet
bo = bobble stitch
sl st = slip stitch
sp = space
st(s) = stitch(es)
American crochet terms used throughout
Special Stitch Used:
Bobble stitch (bo) = [Yarn over and draw up a loop] 3 times, draw yarn through all 7 loops on hook
Gauge:
4″ x 4″ = 13 hdc, 10 rows
Finished Size Approximately:
Finished bust measures: S = 34″, M = 38″, L = 42″, XL = 46″
Length is customized to your preference
Notes:
The number of stitches required per size are indicated in parentheses: (S, M, L, XL). If only one number is given, then use that number for all sizes.
Instructions:
R1:
Ch 77, hdc in 3rd ch from hook and in each ch across, turn. (75 sts)
R2:
Ch 1, sc in 1st st, bo in next st, sc in next st, *skip a st, 5dc in next st, skip a st, sc in next st, bo in next st, sc in next st; repeat from * across, turn.
R3:
Ch 1, sc in each of the 1st 3 sts, *ch 2, skip 2 sts, sc in back loop only next st, ch 2, skip 2 sts, sc in each of next 3 sts; repeat from * across, turn.
R4:
Ch 1, hdc in each of the 1st 3 sts, *hdc in ch-2 sp, hdc in sc, hdc in ch-2 sp, hdc in each of the next 3 sts; repeat from * across, turn.
R5 (this is an increase row):
Ch 1, hdc in each of the 1st 3 sts, *2 hdc in the next st, hdc in each of the next 3 sts; repeat from * across, turn. (93 sts)
R6:
Repeat row 2.
R7:
Repeat row 3.
R8:
Repeat row 4.
R9 (this is an increase row):
Ch 1, hdc in each of the 1st 4 sts, 2 hdc in the next st, *hdc in each of the next 4 sts, 2 hdc in the next st; repeat from * across, ending with a hdc in each of the last 3 sts, turn. (111 sts)
R10:
Repeat row 2.
R11:
Repeat row 3.
R12:
Repeat row 4.
R13 (this is an increase row):
Ch 1, hdc in each of the 1st 5 sts, 2 hdc in the next st, *hdc in each of the next 5 sts, 2 hdc in next st; repeat from * across, ending with a hdc in each of the last 3 sts, turn. (129 sts)
R14:
Repeat row 2.
R15:
Repeat row 3.
R16:
Repeat row 4.
R17 (this is an increase row):
Ch 1, hdc in each of the 1st 6 sts, 2 hdc in next st, *hdc in each of the next 6 sts, 2 hdc in next st; repeat from * across, ending with a hdc in each of the last 3 sts, turn. (147 sts)
R18:
Repeat row 2.
R19:
Repeat row 3.
R20:
Repeat row 4.
If you are making a size S you are finished increasing and are ready to split the yoke. Skip rows 21 – 32 and continue working at row 33. For sizes M, L and XL, continue as follows.
R21 (this is an increase row):
Ch 1, hdc in each of the 1st 7 sts, 2 hdc in the next st, *hdc in each of the next 7 sts, 2 hdc in the next st; repeat from * across, ending with a hdc in each of the last 3 sts, turn. (165 sts)
R22:
Repeat row 2.
R23:
Repeat row 3.
R24:
Repeat row 4.
If you are making a size M you are finished increasing and are ready to split the yoke. Skip rows 25 – 32 and continue working at row 33. For sizes L and XL, continue as follows.
R25 (this is an increase row):
Ch 1, hdc in each of the 1st 8 sts, 2 hdc in the next st, *hdc in each of the next 8 sts, 2 hdc in the next st; repeat from * across, ending with a hdc in each of the last 3 sts, turn. (183 sts)
R26:
Repeat row 2.
R27:
Repeat row 3.
R28:
Repeat row 4.
If you are making a size L, you are finished increasing and are ready to split the yoke. Skip rows 29 – 32 and continue working at row 33. For size XL, continue as follows.
R29 (this is an increase row):
Ch 1, hdc in each of the 1st 9 sts, 2 hdc in the next st, *hdc in each of the next 9 sts, 2 hdc in the next st; repeat from * across, ending with a hdc in each of the last 3 sts, turn. (201 sts)
R30:
Repeat row 2.
R31:
Repeat row 3.
R32:
Repeat row 4.
Splitting the yoke:
R33:
Ch 1, hdc in each of the first (24, 27, 30, 33) sts, ch 4, skip the next (25, 28, 31, 34) sts, hdc in each of the next (49, 55, 61, 67) sts, ch 4, skip the next (25, 28, 31, 34) sts, hdc in each of the last (24, 27, 30, 33) sts.
R34:
Repeat row 2.
R35:
Repeat row 3.
R36:
Repeat row 4.
R37:
Ch 1, hdc in each st across, turn. (105, 117, 129, 141) sts
R38 – 41:
Repeat rows 2, 3, 4 and 37.
R42 – 45:
Repeat rows 2, 3, 4 and 37.
R46 – 49:
Repeat rows 2, 3, 4 and 37.
R50 – 53:
Repeat rows 2, 3, 4 and 37.
R54 – 57:
Repeat rows 2, 3, 4 and 37.
R58 – 60:
Repeat rows 2, 3, and 4.
Try on your Beachcomber Crochet Cardigan to check the length. If you would like to make it longer, just keep repeating the pattern until you reach your desired length, ending on a row 4. Then begin the edging as follows.
1st round of edging:
Ch 1, hdc in 1st st and each st across bottom edge of cardigan, continue evenly spacing hdc’s up the front side of the cardigan, around the neck, and down the opposite side (placing 2 hdc’s in each turning corner). Sl st to beginning hdc.
2nd round of edging:
Ch 1, sc in same st, *ch 3, sl st into the 1st ch, skip a st, sc in the next st; repeat from * across bottom edge of cardigan, up the front side of the cardigan, around the neck, and down the opposite side. Sl st to beginning sc. Fasten off.
For the sleeves:
Re-attach yarn at the bottom of each armhole. Hdc evenly around the armhole and sl st to beginning hdc. Ch 1, sc in same st, *ch 3, sl st into the 1st ch, skip a st, sc in the next st; repeat from * around and sl st to beginning sc. Fasten off and weave in all ends.

Enjoy!
If you make the Beachcomber Crochet Cardigan I’d love to see it. You can tag me @cashmeredandelions on Instagram!


Love the pattern, can it be printed?
Thank you for asking! At this time I don’t have any patterns available as pdf downloads for printing. I’ve noticed that many bloggers who offer a pdf option/printable do so for a small fee (due to the extra time and work involved). For now, I want to keep things free and simple by sharing them on this blog. That may change in the future however, so please check back!
I am stuck on row 33. Am I supposed to skip over the ch4 in the next row? I am making a size large.
For the size L you will hdc in 30 sts (which creates one side of the front panel of the cardigan), ch 4 and skip 31 sts (which creates the first armhole), hdc in 61 sts (which creates the back of the cardigan), ch 4 and skip 31 sts (which creates the second armhole), and hdc in the last 30 sts (which creates the opposite side of the front panel of the cardigan). Hope this helps!
Am I stil.crocheting all the way across in the next rows? On row 37, it says I should end up with 129 sts, but I still have 201??
It sounds like you are possibly trying to stitch around the armholes too. You split the yoke in row 33 in order to create the opening for the armholes, but you do not actually start crocheting sleeves until after you complete row 62.If you recall in row 33 you skipped 31 stitches on each side to make the armholes. You will continue to skip those stitches until it is time to work the sleeves after row 62.The easiest way I can explain it is to pretend that we are going to work row 34 in all hdc instead of in the pattern. To do so, you would hdc in each of the 1st 30 sts, hdc in each of the ch-4 sts, (skip the 31 sts you already skipped in the previous row), hdc in each of the next 61 sts, hdc in each of the ch-4 sts, (skip the 31 sts you already skipped in the previous row), and hdc in each of the last 30 sts. This would make your stitch count = 129. Hope this helps!
I’m actually stuck in rows 34-37. Do I skip over the sleeves?? After row 37, I ended up with 179 std instead of 129???
I may have answered this question with the response I just posted. If not, please let me know.
Is is possible to make it larger without using thicker yarn?
The reason I did not write the pattern in a broader range of sizes is because I did not feel I was getting the proportions right. I have other patterns that go up to a larger size that you may want to try. Good luck and I’m sorry I couldn’t work this pattern out to fit all sizes.
Thank you so much for this beautiful pattern.
Laura
Row 4: HDC in 2ch-sp, do you mean 2 HDC in the 2ch-sp?
No, it is correct as written.