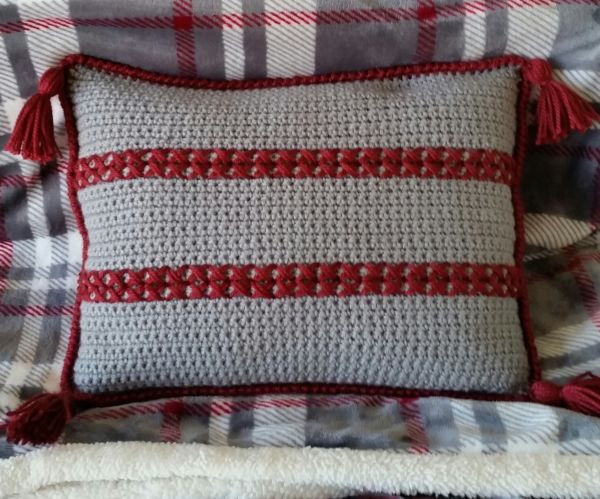
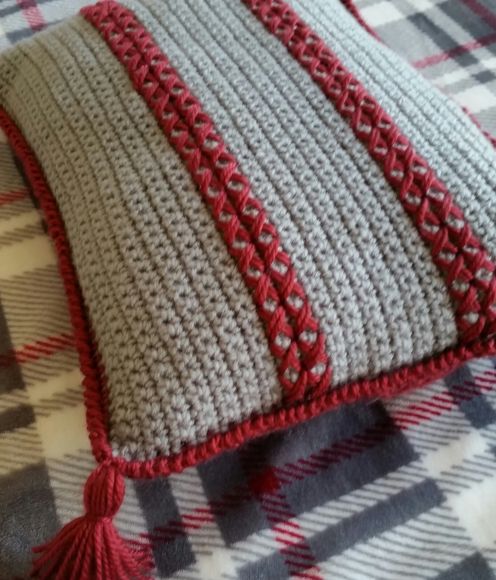
Today I’m sharing a free pattern for a simple but stunning cross-stitch crochet pillow! If you have never done cross-stitch on crochet before, this is a perfect beginner level project. The pattern calls for only four (4) rows of cross-stitch, with each stitch being worked over 4 single crochets. This creates a jumbo cross-stitch design that is really eye-catching.
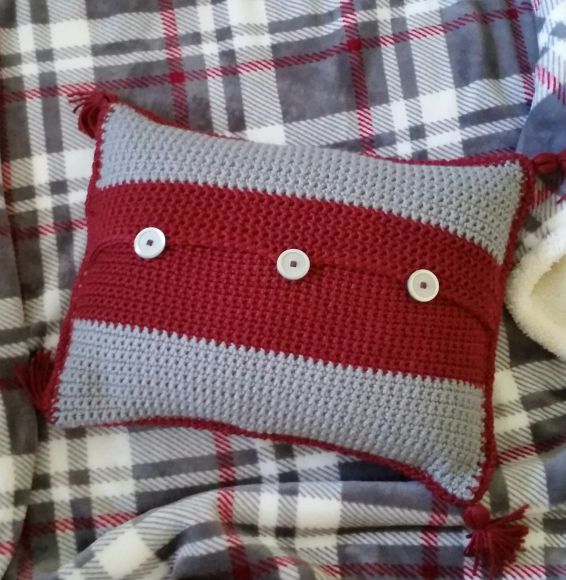
I used two different brands of yarn for this project and really loved the effect of how the high sheen of the garnet Yarn Bee Soft Secret yarn contrasted with the muted grey of the Red Heart Super Saver yarn. The back side of the pillow features a fun color block design. If you would like to make a cross-stitch crochet pillow of your own, read on!
PIN this pattern to your Pinterest boards here.
Cross-Stitch Color Block Pillow
Materials Used:
- 1 skein Yarn Bee Soft Secret – Garnet
- 1 skein Yarn Bee Super Saver – Dusty Grey
- Size I/9 – 5.50 mm crochet hook
- 12″ x 16″ pillow form
- Three (3) 1-1/8 buttons (28mm)
- Sewing needle for sewing on buttons
- Tapestry needle for weaving in ends
Abbreviations:
ch(s) = chain(s)
st(s) = stitch(es)
sc = single crochet
sl st = slip stitch
sp = space
American crochet terms used throughout
Gauge:
4″ x 4″ = 13 sc, 18 rows
Finished Size Approximately:
12″ x 16″
Note: Your pre-assembled panels should be slightly smaller than the indicated finished size. They will stretch once the pillow form is inserted, and this helps achieve a snug fit.
Instructions:
To make the front panel:
Row 1:
With dusty grey, ch 50. Sc in 2nd ch from hook and in each ch across, turn.
Rows 2 – 49:
Ch 1, sc in each st across, turn. Fasten off and weave in ends.
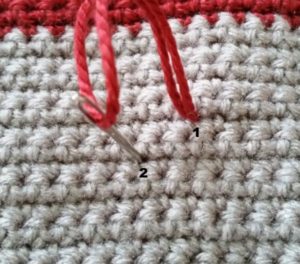
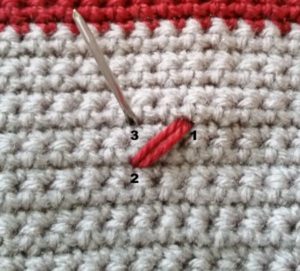
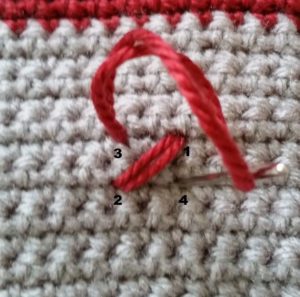
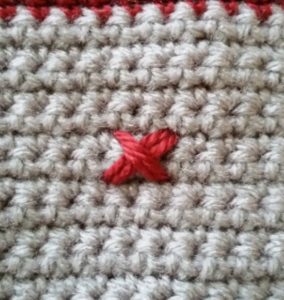
To add the cross-stitches, thread a tapestry needle with a long length of garnet yarn. I doubled the yarn over so that I would be cross-stitching with two strands of yarn. Work one cross-stitch over 4 single crochets (2 sc’s on one row, 2 sc’s on the row above), as shown in the photos below. Cross-stitches will be worked on the following rows: 16-17 (remember each cross-stitch covers 2 rows), 18-19, 32-33, and 34-35.
To make the 2 back panels:
Panel 1 (bottom panel):
Row 1:
With dusty grey, ch 50. Sc in 2nd ch from hook and each ch across, turn.
Rows 2 – 16:
Ch 1, sc in each st across, turn.
Rows 17 – 34:
With garnet, ch 1, sc in each st across, turn. Fasten off and weave in ends.
Panel 2 (top panel):
Row 1:
With dusty grey, ch 50. Sc in 2nd ch from hook and each ch across, turn.
Rows 2 – 16:
Ch 1, sc in each st across, turn.
Rows 17 – 26:
With garnet, ch 1, sc in each st across, turn.
Row 27:
Ch 1, sc in each of 1st 10 sts, ch 3, skip 3 sts, sc in each of next 10 sts, ch 3, skip 3 sts, sc in each of next 10 sts, ch 3, skip 3 sts, sc in each of last 10 sts, turn.
Row 28:
Ch 1, sc in each of 1st 10 sts, 3 sc in ch-3 sp, sc in each of next 10 sts, 3 sc in ch-3 sp, sc in each of next 10 sts, 3 sc in ch-3 sp, sc in each of last 10 sts. Fasten off and weave in ends.
To attach the front and back panels:
With right sides facing out, line up Panel 1 with the bottom edge of the front panel and Panel 2 with the top edge of the front panel. Panel 2 will slightly overlap Panel 1, with the button holes near the center of the pillow. Pin in place if necessary. Attach garnet to any corner and work 1 round of sc evenly spaced around all four sides of the pillow, placing [1sc, ch1, 1sc] in each corner. Sl st to beginning sc.
For the border:
Still using garnet, ch 1 and work 1 round of crab stitch (also known as reverse single crochet) evenly around all four sides of the pillow. Work this stitch exactly like a single crochet, except work into the stitch to the RIGHT of your hook (not the left).
Finishing:
Attach buttons to line up with the corresponding button holes. I used 1 strand of garnet yarn to attach my buttons. I also added a tassel to each corner of my pillow. If you need help, there are many great tutorials and videos available online. Just google “how to sew on a button” and “how to make a tassel out of yarn.”
And that’s it! I hope you enjoy this free pattern. If you make a cross-stitch crochet pillow, I’d love to see it. You can tag me @cashmeredandelions on Instagram!

